How to Set Up MCP Servers in VS Code (Step-by-Step)
Connect GitHub Copilot to external tools with MCP servers. Complete VS Code setup guide with JSON configuration examples, debugging tips, and common troubleshooting fixes.
 VS Code
Prerequisites
- Visual Studio Code version 1.99 or later
- GitHub Copilot extension installed and configured
- Docker Desktop or uvx or pip
What is MCP?
MCP (Model Context Protocol) follows a client-server architecture where:
- MCP clients (like VS Code) connect to MCP servers and request actions on behalf of the AI model
- MCP servers provide tools that expose specific functionalities through a well-defined interface
- The protocol defines the message format for communication between clients and servers
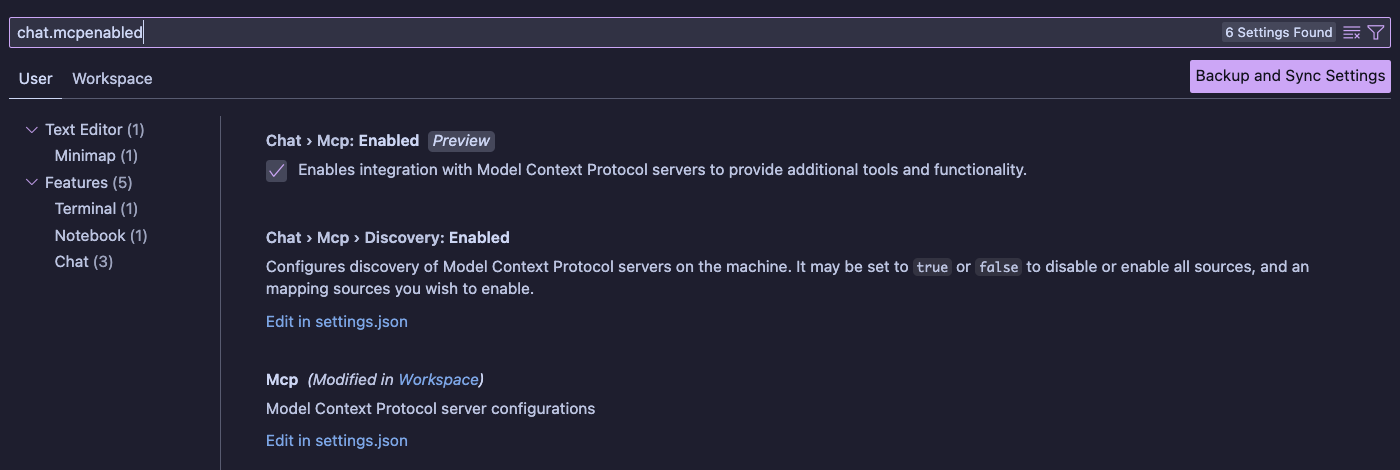
Enabling MCP Support
MCP support is enabled by default in VS Code 1.99+. If you need to manually enable it:
- Open VS Code Settings
(⌘,on macOS)
(Ctrl+,on Windows/Linux) - Search for "chat.mcp.enabled"
- Ensure the setting is checked
Adding an MCP Server
There are two main ways to configure MCP servers:
lets add the Time MCP Server for example
1. Workspace Configuration, recommended
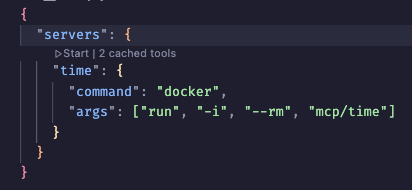
Create a .vscode/mcp.json file in your workspace:
{
  "servers": {
    "time": {
      "command": "docker",
      "args": ["run", "-i", "--rm", "mcp/time"]
    }
  }
}
2. User Settings Configuration
To use an MCP server across all workspaces, add it to your VS Code user settings:
- Open User Settings (⌘, on macOS, Ctrl+, on Windows/Linux)
- Search for "mcp"
- Add your server configuration under the "mcp.servers" setting
3. Starting the MCP Server
Before starting the MCP server:
- Ensure Docker Desktop is running on your machine
- Open your workspace that contains the
mcp.jsonconfiguration
Once you have created the mcp.json file, VS Code will automatically detect it and display a "Start Server" button directly in the editor:
 .vscode/mcp.json
Click the "Start Server" button to initialize the MCP server. Upon successful startup:
- A Docker container will be created and started automatically:
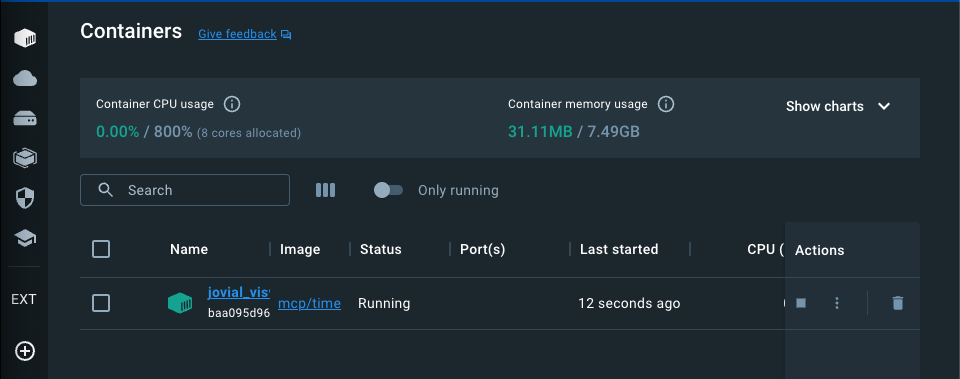 Active Docker container running the MCP Time server
- The
mcp.jsonfile will update to reflect the server's running status:
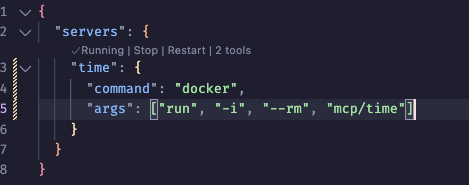 Updated mcp.json showing server running status
4. Using the MCP Server in VS Code Chat
Once the server is running, you can start using it through VS Code's chat interface:
- Open VS Code's chat panel (Ctrl+Shift+I or Cmd+Shift+I)
- You'll notice a "Select Tools" button in the chat input area:
 Chat input showing the Select Tools button
- Click "Select Tools" to configure Time MCP Server
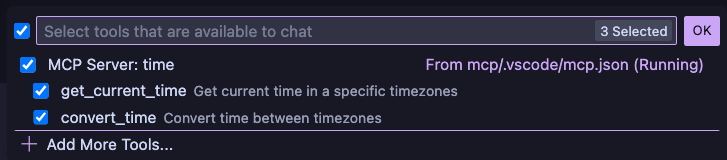 MCP tool selection dialog showing available tools
Select the time-related tools you want to use. These tools will now be available in your chat conversations with GitHub Copilot.
5. Using MCP Functions
After enabling the tools, you can start using the MCP functions in your chat conversations. Here are some examples:
- Getting the current time:
- Simply ask for the current time in a specific timezone
- If the model tries to write a time function, redirect it to use the MCP function
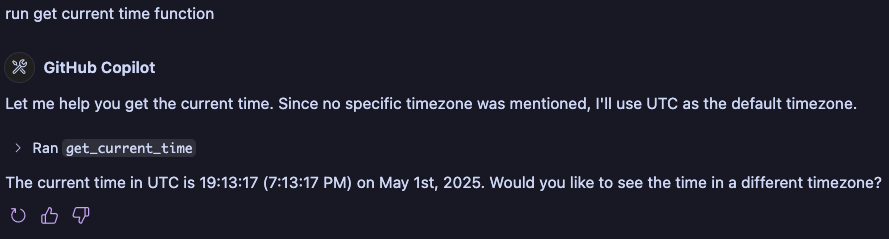 Using get_current_time MCP function
- Converting between timezones:
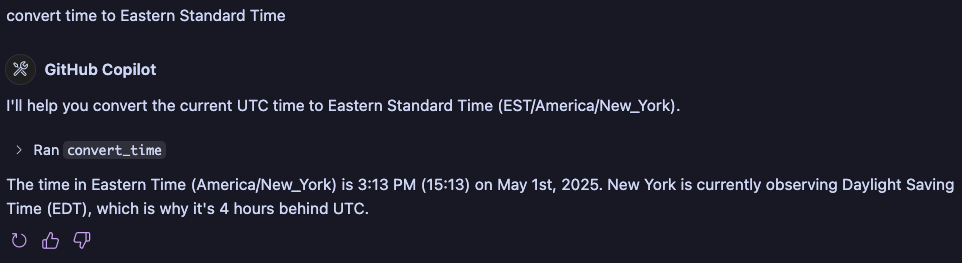 Using convert_time MCP function
6. Monitoring MCP Server Activity
You can monitor the MCP server's activity through Docker container logs. These logs show the JSON-RPC communication between VS Code and the server, including:
- Server initialization and capability registration
- Tool definitions and schemas
- Request/response pairs for function calls
Security Considerations
⚠️ Caution: MCP servers can run arbitrary code on your machine. Only add servers from trusted sources, and always review the publisher and server configuration before starting it.
🔒 Important: Never hardcode sensitive information like API keys. Use input variables or environment files instead.
Troubleshooting
If you encounter issues:
- Check the error indicator in the Chat view
- Select "Show Output" to view detailed server logs
- Use the "MCP: List Servers" command to check server status
Further Resources
Related Articles
AI/ML Tools MCP: Seamless Integration for AI Workflows
Integrate leading AI/ML frameworks, model management, and training pipelines with AI/ML Tools MCP. Enable robust model serving, training orchestration, and MLOps workflows.
HuggingFace MCP Server
HuggingFace MCP server provides AI assistants with access to the model hub — search 1M+ models, discover datasets, explore Spaces, read papers, and fetch documentation directly through MCP.
Elasticsearch MCP Server
Elasticsearch MCP servers enable AI models to interact with Elasticsearch, providing capabilities for searching documents, analyzing indices, and managing clusters.